
















The studio is an important resource for both journalism and other classes. Sometimes, students must use the studio to edit video or audio, but they do not know where to start. As the studio manager, I want to make sure the studio is accessible for use and to learn. Final Cut is what we use to edit the newscast every week, and what I use to put together a photo in front of podcast audio. Logic, on the other hand, is only used to record audio and MIDI, whether it is to make music, record podcasts, or otherwise.
Logic Pro
Logic is a Digital Audio Workstation (DAW) used to make music, podcasts, voiceovers, and more. It is primarily used in the desktop computer in front of the drum booth. The password to that computer is Tw..2022
To use Logic, you have to open the app, press the file in the upper right corner, and then press “new”. It will then show you many options for what kind of audio you want to record. To record your voice, press the “Audio”. Under the computer, there is an audio interface (looks like a big box) that says “input 1” and “input 2”. This represents which audio is input into the computer to make the noise it will make. You have to choose which input you want to use in the track and then connect an XLR cable to a microphone in that respective input on the interface (big box) under the computer. If you press record, it will start to record what you put into the microphone; however, if you want to hear what you are playing, press “I” in the track.
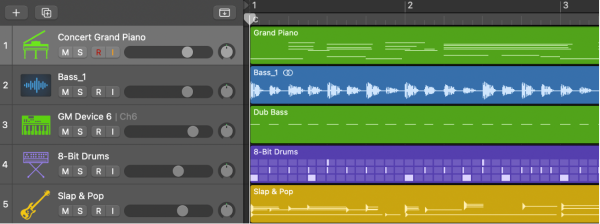
The “M” is to mute the track, the “R” is to record, and the “S” is to solo it (which means it will only play that track when you run it back).
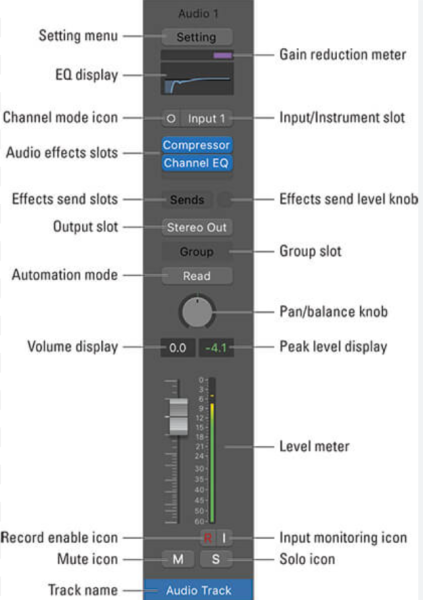
If the input is not generating any sound, there is probably a problem with the output settings. (Make sure it says “stereo out”, or make sure the volume is on)
It may also just be the audio being quiet. In that case, increase the gain.
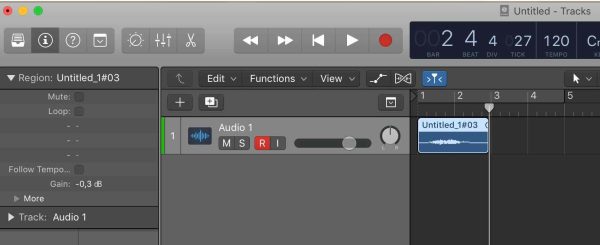
Otherwise, the interface hardware may not be turned on, and you will have to turn it on so the computer can connect to it. With these input and output settings, you can also record guitar, bass, and drums.
After you record, you should save your work in its respective folder. If you want to export it into an audio file, you just click on “file” and “bounce” to “project or section”.
Note: You don’t necessarily need the booth to record your voice; it will just eliminate any background noise. However, if you choose to do so, make sure the microphone in the booth is plugged into whichever computer you are using.
Basic Audio Engineering
Audio engineering is a whole different beast, but it can make your sound more professional and clean. Do you ever wonder why demos and final projects sound so different? There is usually a mixing engineer who cleans up each track and balances the audio together. The simplest way to begin to figure it out is to learn about the equalizer, compressor, and reverb.
It is not as helpful to explain the equalizer with only a written description, but this chart will do.
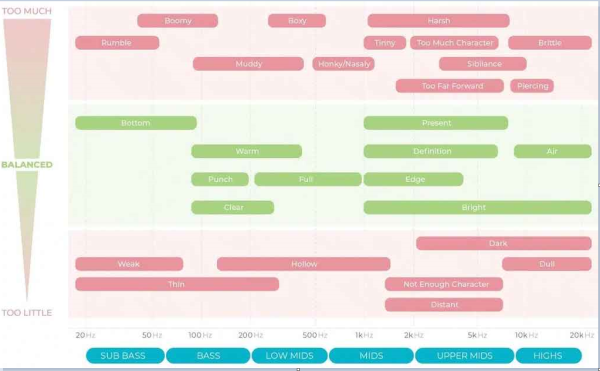
Mess around with an equalizer and boost/cut around, and notice how the audio changes.
Listen closely, if it sounds too muddy, cut a few decibels off around 100 hertz to 500 hertz (and so on). A great source to check out for further learning is this YouTube video. It may be on the longer side, but it has taught me everything I know about an equalizer. Of course, there are many other shorter videos about an equalizer, but this is the most in-depth available (courses like this are usually very expensive!).
On the other hand, a compressor is used to tame the dynamics in the volume of the audio. Harsh peaks can be lowered, and quiet parts can be raised. Picture a compressor as if it were a little man turning the volume knob up and down when appropriate. 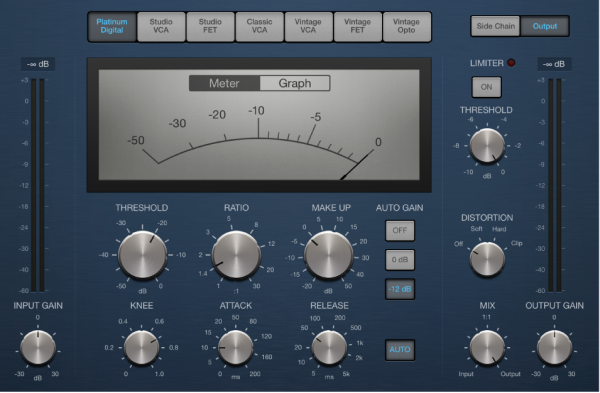
This is how the stock plug-in looks in Logic. The meter on the very top depicts how much the volume knob is being turned down. If you see it going up, that is when the volume is decreasing.
The attack and release is how quickly the compressor turns on the volume and releases it. Your attack and release will look different based on what you want your compressor to do.
Typically, for podcasts, you would want a consistent audio. If your guest laughs too loudly and talks too quietly, you would want to tame that. Therefore, you want the attack to act right away and the release to act slowly.
This is another tutorial from the same channel that is also very long, but is very in-depth, and it explains how the different parameters of compression work. I use the information in this video when I am mixing to this day.
Compression is not something you hear per se… but more so something you feel, especially drums. Here is another video that taught me how to view compression.
Conclusion:
I hope this helps. It is difficult to write about audio rather than demonstrating, but these YouTube videos have taught me everything I need to know, and I hope they are useful for you! Feel free to email me any questions and/or DM me on Instagram.